Showing posts with label Food. Show all posts

Tuesday, June 24, 2014

Exterior progress, and priming for a start on the interior

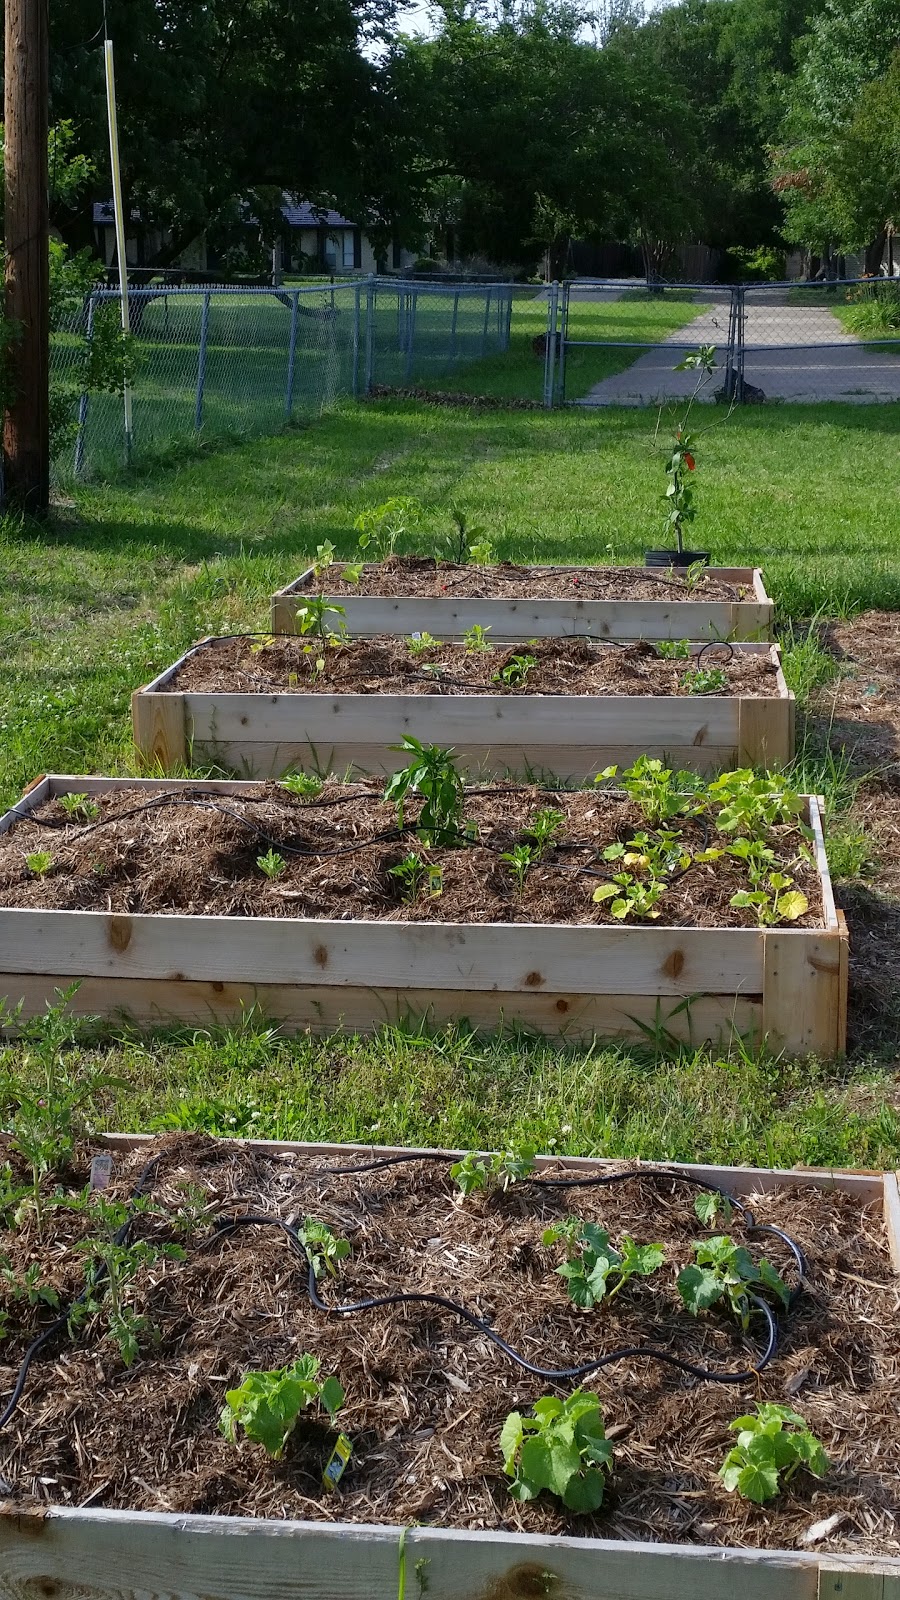
The garden is chugging along! We're gathering notes on improvements that we want to make, and are planning for the fall season and for next spring. A few more raised beds, a ground plot, and a greenhouse are all planned for the future!

We're starting to get some small fruits of our labor, but the late start due to a late freeze, and the drip irrigation not being installed until the end of May led to a late harvest. We're hoping to get a bit more out of the garden before the heat kills everything.

On the inside, we're still in a holding pattern, waiting for funding and time to do some more work. We're looking to start with re-drywalling the entryway and dining room (and checking for any termite damage), and then getting new trim up in the living area. We're beginning to formulate a kitchen remodel plan, but don't know exactly when that will happen. Perhaps next spring?

I've been a bit busy over the last few weeks fixing some plumbing issues. The faucet had started leaking in the master bath, and so I had to replace it. As part of that, I needed to replace the drain pipe as well. Upon further investigation, I realized that I needed to replace all of the drain under the sink, all the way to the wall!

Here are a few tips from that experience:
  • There is ALWAYS a proper pipe for the thing you need to do... don't compromise and silicone things together (this is why I decided to replace the whole thing... there was a pretty sketchy silicone job on one of the joints)
  • Avoid rubber adapters like the plague. If you need to use a flexible line, make sure it's the same diameter at both ends. 
  • Also, avoid vinyl flex line... It's practically impossible to get a watertight seal!
  • Plumber's putty makes a better seal than silicone, in my experience. The first run-through, the silicone didn't adhere to the drain nor the sink. The second run-through had no leaks using plumber's putty
  • Assemble the entire thing outside the sink before trying to install it. You'll find so many issues doing that.
  • Get a pile of towels and a bucket or two... water will leak, and it will soak into the cabinet.
  • There is a right direction and a wrong direction for the little plastic O-rings between the pipes. If you get it right, it's watertight. If you get it wrong, you can tighten it to Hulk-like tightness, and it will still leak.

One of the big outdoor things that needs to happen ASAP is a trellis structure between the raised beds. Currently everything is growing on the ground, and while that is OK, it would be so much nicer to have the cucumbers, squash, beans, and tomatoes growing up rather than out.


Wednesday, June 4, 2014

Good Recipe: Grilled Zucchini

This was a good recipe we had last night alongside crab legs. I think it could have used a little more marinating time, but overall it was a good recipe.

Ingredients:
4x Zucchini sliced longways
Pinch of salt
Olive oil (enough to coat the zucchini when marinating)
Fresh basil leaves, torn
roasted garlic, minced

Tools:
Freezer bag
Grill


Instructions:
1) Slice the Zucchini and place into the freezer bag
2) Add olive oil, salt, and garlic to the bag
3) Tear the basil leaves and add to the bag
4) mix the marinade around in the bag and let sit for an hour or so (I didn't do this step, and it still turned out ok, just a little bland
5) Set the grill to a medium-high heat
6) place the zucchini on the grill and let it cook
7) flip the zucchini and let cook for a bit longer
8) Serve hot.

Thursday, May 29, 2014

Traveling and not worried about it!


Things are growing well, especially now with the drip irrigation system fully installed and set on a timer. The potato cages have made the potatoes into superstars! They've grown about 6 inches even since the above photos were taken! I'm going to add a shovel full of compost to each in order to promote more tuber growth, but I'm super happy with the results in the potato cages! 


The rest of the vegetable garden have similarly grown a bit since the photo, but you can see the little black drip irrigation tubes running through all the beds. They're doing a great job keeping the plants green and growing! We've got some small veggies on the way soon! 
First Bell Pepper of the season!

The kitten got into the compost, trying to figure out why we're throwing all the perfectly good food in the yard!

I got the irrigation done just in time, as we've been traveling, and will be traveling for the next 2 weeks! We went to the Indy 500, and Lauren loved the track tenderloin!

The tenderloin is a meal just itself!

Tuesday, May 6, 2014

Crunch time! (Or the leaves are all gonna go crunchy in the heat)

I'm currently in week 2 of final exams to end my first year in law school, and things are starting to heat up in North Texas! It was well over 90 degrees yesterday, and 85 is about average this week.


After the late freeze in April, I gave the plants just under a month to recover and took stock of my losses. We lost everything out of the garden except for 1 strawberry plant, some corn, green beans, and peas. The potatoes were damaged, but appear to be making a comeback. The berry patch is fine, and all the trees but the peach are looking great! The peach appears to be alive (by the green bark test), but hasn't popped out any leaves. Until my green bark test fails, I'm going to treat the peach tree just like any of the trees with leaves, and just hope that it is spending its first year storing nutrients or something.

First strawberry of the year! (We've since gotten 4 smaller ones)

I ran out to the local home improvement store and picked up a bunch of starter plants to replace the ones lost in the freeze, and was able to find direct replacements for much of what I lost. We'll see how it turns out, but we're both excited at the prospect of good food in the next month or so! 

This, however, means that it is crunch time in the greatest sense. The drip irrigation system is still not finished, there is no sun shade ready, and the trellis is not built yet. These plants are weeks or even days away from vegetable armageddon if I don't properly prepare them for summer!
The ducklings in the pond at work getting ready for the summer

In other news, we've acquired another working cat for the yard! We've been getting a bunch of presents from the existing cats in the form of snakes and other creepy crawlies, and we decided that we need a fully clawed cat to patrol the area and help them keep our property clear of snakes, big spiders, and scorpions. She's not much to fear quite yet, but she's got a hunter's instinct, and the razor sharp claws to follow through! She already got me pretty good with a bite (she's still learning the difference between licking stuff off my finger and biting my finger).

Mrs. Claws, our new cat!


Tuesday, April 8, 2014

Old house, old car, DIY everything: Why do we do these things?

I tend to post a lot of progress reports and pictures of things, but I sometimes avoid mentioning the motivations behind why we have chosen to live a DIY lifestyle. Perhaps that is because I find it difficult to properly explain the "why." More likely it has to do with the phenomenon that Dave Ramsey highlights here:


By the way, I'm a HUUUUGE Dave Ramsey fan. I think that a bunch of people don't really understand him, but I find him to be so real and true to the principles that Lauren and I adhere to. However, it's hard to fight the good fight, it's hard to espouse the principles that are like a foreign language to most.

Here I am, though, writing a post about my motivations for buying a "fixer upper," for growing a food garden, for planting an orchard, and for not hiring out like our lives depend on it. Our lives DO depend on it!

One of the biggest turning points in my life was when I canceled cable for a year. It was hard to imagine life without TV, but there I was, 22 and TV-less. After a few weeks of emotional retching, a psychological withdrawal that I imagine was a toe in the water of what coming off a drug habit would feel like, I broke through and realized that TV was nothing but mindless cheap entertainment. As the weeks and months passed, I found an even more powerful truth, one that has affected me deeply to this day, one that I required to be shared by my now wife. When you break free from a life separated by 2 minute intervals of greed-pleading (commercials), you become content with what you have. It was the strangest thing. I could go days and weeks without spending money. I could adhere to the budget more closely. I could focus on what is truly important in life, not money, not stuff, not cars nor houses, but bringing a God-led giver's heart to my relationships, my activities, and my life.

What does this have to do with buying old stuff and doing a bunch of DIY things? EVERYTHING! Lauren and I have found it difficult to let go of the materialism and the temporary comfort of money and stuff, but it has been extraordinarily rewarding so far! When you buy for quality, when you do the work yourself, when you generally connect yourself to your consumption, you appreciate life more. I wrote earlier about how gardening promotes enjoyment of the simple things in life. This is absolutely true, and something that Lauren and I are working hard to leverage. Whether it's just sitting on the porch and having dinner together, making the next day's lunch together, hauling bags of dirt to the raised beds together, or tearing down a wall together, we are drawn to one another when we DIY, when we garden, and when we are frugal. I can't think of any better way to start a marriage off than to focus on what brings us together!

God has brought into focus a few core principles that we work to build into our lives: 1) Focus on Him, not on others; 2) Hard work can be a blessing; 3) Appearances are less important than substance; 4) Give abundantly; and 5) Be content with where you are. Frugal, DIY, natural, and personal living really helps us to hit all five principles on a regular basis.

Monday, April 7, 2014

Is growing a garden important?

I absolutely think that growing a garden is an important step to bettering my and my family's lives. There are three major reasons that I feel this way, and don't think that I'm being at all hyperbolic in saying that a garden will truly improve our lives.

1) It's a great way to remind us of some great life lessons. Gardening is sometimes a microcosm of life. You have to practice perseverance, or your crop will wither and die. You must put in hard work, as the garden doesn't just plant itself. You must delay your gratification, as it takes months for the fruits of your labor (pun intended) to come to you. You learn to derive satisfaction out of small things. You connect the hard work it takes to tend and harvest the plants to the food on your dinner plate. God has more control of the outcome than you do.


I think that i've most appreciated the small amounts of sustained work that come with tending a garden. Being in a season of my life where I spend 12 hours a day engaged in intellectually exhausting work, I truly appreciate time every week to shut my brain off and let my hands do the work. Sometimes I literally have to stop myself from over-tending the garden, because I so enjoy the mindless labor that goes into working the soil.

I've also learned that I truly appreciate the small things in life a little bit better when gardening. When the difference between success and failure expresses itself in a nearly microscopic green bud (or even worse, no green bud, but green under the bark), it's easy to miss the signs. Forcing myself to slow down and observe the small things makes me appreciate those things all the more.

2) There's nothing more natural and local than your own backyard. I don't really find myself hopping on the food bandwagons. I'm not "organic-only", and I'm very skeptical of the anti-GMO movement. However, I can absolutely appreciate local, natural produce. It absolutely makes sense to me that when you're getting your apples from Chile, you're making a tradeoff. Either the apple is being bred for the best flavor, size, and quality, or it's being bred to make the trip to the supermarket without spoiling. Similar tradeoffs happen when you're mass farming. Either you can breed for taste and quality, or you can breed for other characteristics that increase yields at the expense of taste and quality. This isn't confined solely to breeding, but also extends to farming practices, transportation practices, and more. When you can walk into your backyard and pluck an apple off the tree with no concern of shipping it 3000 miles or having enough yield to offset farming costs, you can grow your apples in a way that is tasty and high quality, rather than compromising.


3) It has the potential to save huge sums of money. Just like any hobby or interest, you have to be really good at it to make decent money, but you don't have to be nearly as good to save a little money. This year I'm doing an experimental garden to see what grows the best in our climate and soil. Then, next year, I'll focus on what works, and see how much we can save by growing a bunch of the food that we can grow well. Will it save money? I sure hope so. Does it have to in order to justify the garden? I don't think so. However, once we start seeing the return from our crops, I think we'll be much happier to invest time and money into the garden.

Friday, April 4, 2014

Springing up!

After a couple weeks of working hard for law school and at work, I'm finally getting a chance to relax for 5 minutes and type up a post!

A few exciting things have happened in the last 2 or 3 weeks! First, I filled the raised beds with compost and mulch!


You would think that getting the dirt in bulk would be cheaper (and it was), but the margin between bagged and bulk was close enough with delivery fee that the convenience of having the stuff same-day overrode the cost savings.

I spent a few hours dragging bags of dirt and mulch the 50-100 feet from their staging area to the raised beds, and got them all filled up very quickly! I made sure to have a garden hose moistening the dirt as it went in so that some of the moisture was sealed in when I put the mulch on top. The next weekend, I planted crops in the beds, and I've been watering ever since!

Now, we're starting to see some of the results of the care we're giving those plants.


The trees are budding and growing leaves! All but the "southern" trees have some leaves on them at this point, with the peach and nectarine holding out for warmer weather.


The raspberries, blueberries, and blackberries are all growing some leaves as well.They handled the cold weather at the beginning of March really well, and they're now growing like weeds!


The strawberries are struggling with transplant shock, but the ones I didn't transplant are surviving and doing alright.


The potato cages and the raised beds are showing signs of life as well! I need to get trellises up to allow the plants to grow up instead of out.

Hopefully as we get some rain and some warm (but not hot) temps, the plants will establish themselves enough to make it through the hot summer, or at least bear fruit before the scalding summer hits.


Thursday, April 3, 2014

HOW TO: Make homemade pizza dough

Homemade pizza is a great treat to make without having to spend $20 to have somebody deliver a couple boring dough frisbees in a cardboard box. 

Even after saying that, I do love me some delivery pizza, or even better, Papa Murphy's! However, all of those pale in comparison to homemade, from scratch pizza.


Ingredients:
- Whole wheat flour ~3 cups
- White flour ~4 cups
- 1 Tbsp sugar (I usually use brown sugar)
- 1 Tbsp salt
- 2 Tbsp olive oil (I usually use extra virgin, but the flavor doesn't really come out in the dough very much)
- 0.25 Oz (1 packet) active dry yeast
- 2.5 cups warm water (110 degrees or so)
- Small amount of corn meal


Tools:
- Pizza Stone
- Rolling pin (Optional)
- Non-stick pastry paper/silicone mat (Optional)
- Stand mixer or large prep bowl
- Large mixing bowl
- Damp Cloth

Instructions:

NOTE: You can adjust the balance of white and whole wheat flour to suit your tastes. The recipe this is derived from uses only 1/2 cup of whole wheat flour and the rest white, whereas you can probably do mostly whole wheat flour as well. I find it a little difficult to work with the dough if I use only whole wheat flour. 


  1. In the stand mixer or large prep bowl, stir the yeast, the sugar, and the water together.
  2. Let the yeast mixture sit for 10 minutes (until yeast activates)
  3. Add 4 cups of flour (white and/or whole wheat), the olive oil, and salt to the yeast mixture, stirring it to a sticky consistency. (You may want to coat anything you're using to stir in oil to keep the sticking down)


  4. Keep adding flour slowly and stirring until the dough pulls together into a ball and becomes more manageable.

  5. Knead the dough (either by hand or by mixer) for 5 minutes or so, allowing the ball to become smooth. If you need to add some more flour because it's still too sticky, go ahead.
  6. Oil the large mixing bowl, and roll the dough around in the bowl (to coat it in a light sheen of oil)
  7. Cover the mixing bowl with a damp cloth and leave it in a warm place for 1hr

  8. After an hour, punch down the dough on a lightly floured and cornmealed silicone mat (or any surface)
  9. Divide the dough into 2 or 3 pieces. I find that 3 equal pieces of dough are just slightly too small for what we want, so I think that 2 large pieces and a third small one would be perfect for 2 pizzas and a side of breadsticks.
  10. At this point you can either freeze the dough for later or roll it out to eat now
  11. Preheat the oven to 425F, heating the pizza stone
    I find pizza stones to be mandatory to having a decent pizza crust. It cooks the crust from the bottom, which is much better.
  12. Using a lightly floured rolling pin (or your hands) form the dough into a pizza crust. It should be thin, but not so thin that it won't support the toppings
  13. Roll the edges over into a crust
  14. Add toppings as you like.
    I find that too much sauce leaves a mushy dough that doesn't quite cook right. You may want to go easy on the sauce until you get a feel for how much is too much
  15. Place the dough on the pizza stone and let it cook for 15-20 minutes, or until cheese is melted and crust is browned